
Why Are My Orchid Leaves Turning Yellow?
Orchids are known for their beautiful and vibrant flowers, but when their leaves start turning yellow, it can be a cause for concern. Yellowing leaves can be a sign of several different issues, ranging from nutrient deficiencies to overwatering or pests.
In order to properly address the problem and get your orchid back to health, it's important to understand the reasons why your orchid leaves are turning yellow. This article will explore the common causes of yellowing orchid leaves and provide tips on how to address the issue to keep your orchids thriving.
Let's look at everything related to Why are my orchid leaves turning yellow.
What Causes Yellowing Orchid Leaves and How to Fix Them?
The beauty and delicate nature of orchids make them a popular flower. However, despite their allure, orchids can sometimes develop yellowing leaves, which can be a cause for concern among orchid lovers.

Understanding the common causes of orchid leaves turning yellow and wrinkled is crucial in order to ensure the health and vitality of these amazing plants.
Let's take a closer look at what causes orchid leaves to turn yellow.
1. Overwatering
Most tropical orchid species are accustomed to growing in dappled shade conditions and high off the ground. These epiphytic plants have unique roots that dangle in the air, absorbing essential nutrients from the tropical atmosphere.
Unlike other houseplants, orchid roots thrive on aeration, making them susceptible to overwatering. Watering orchids excessively can saturate the potting mix, leaving little room for the roots to breathe.
This lack of oxygen can suffocate the plant and hinder its growth. Additionally, overwatering can lead to root rot in orchids, which is particularly common among orchids that are constantly exposed to damp potting mix.
So, what can you do to fix this issue and ensure the optimal health of your orchid?
- Observe and Act: Pay close attention to your orchid's leaf tips. If you notice them turning yellow, it may be an indication of overwatering. In such cases, it is crucial to pause your watering routine immediately.
- Allow Proper Drying: To rectify the situation, give your orchid's potting mix ample time to dry thoroughly. This will help restore the balance and prevent further damage to the roots.
- Repotting and Trimming: If your orchid doesn't recover after drying out, consider repotting it. When doing so, carefully trim away any damaged, blackened, or mushy roots. This will encourage new root growth and improve the overall health of the plant.
- Choose the Right Potting Mix: When repotting your orchid, make sure to use a quick-drying potting mix. This type of mix promotes water run-off and prevents water from collecting around the roots, reducing the risk of overwatering and root rot.
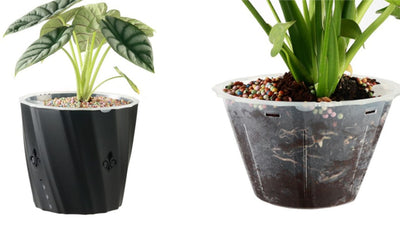
In the quest to provide optimal growing conditions for tropical orchids, utilizing a self-watering planter with drainage holes emerges as a noteworthy option. These specialized planters offer a balanced approach to moisture management, allowing for controlled hydration without the risk of overwatering.

The presence of drainage holes ensures that excess water can escape, preventing the potting mix from becoming waterlogged and safeguarding orchid roots from suffocation.
2. Underwatering
While it is commonly known that overwatering can be detrimental to orchids, it is important to recognize that underwatering can also cause significant harm to these delicate plants.
Orchids require sufficient water to absorb the essential nutrients necessary for their growth and overall health. Failing to provide them with enough water can result in dehydration and a distressed state.

Recognizing the Signs of Underwatering: When your orchid is underwatered or dehydrated, it exhibits several clear signs of distress. Keep an eye out for wilting, as well as softening of the main stem and leaves.
Additionally, the foliage may start to wrinkle, and the leaves may turn yellow. These are all indications that your orchid is not receiving enough water and is experiencing the negative effects of dehydration.
How to Remedy the Situation: If you notice that your orchid's leaves are turning yellow and the potting medium is completely dry, it is crucial to give your plant a thorough watering. One effective method is to hold the plant under a running faucet until water flows through the drainage holes. This ensures that the roots receive enough water to rehydrate the plant.
After watering, it is important to wait for the potting mix to dry out before watering again. Overwatering can be just as harmful as underwatering, so it is essential to strike the right balance. When you rehydrate your orchid, watch it closely for a few days to make sure it's recovered.
3. Direct sunlight
In their natural habitat, tropical orchids grow in the light shade beneath dense tropical canopies. They thrive in indirect sunlight conditions and can easily be harmed by direct sun rays.
If your orchid is receiving too much sunlight, you may notice its leaves turning yellow or even red. This discoloration is a sign that the intense sun rays are bleaching the leaves. If left untreated, excessive direct sunlight can lead to the burning and irreversible damage of your orchid.
If you observe your orchid leaves turning yellow and red, it is essential to evaluate its position. If your orchid is placed near a window where it receives direct sunlight, consider moving it a few feet back.
Alternatively, you can reposition the plant in a room that offers bright, indirect sunlight. Another effective solution is to hang a sheer curtain between your orchid and the window or light source. This will filter the harmful rays and provide the necessary relief for your orchid to recover and thrive.
4. Insufficient Lighting
While orchids are sensitive to direct sunlight, they still require an adequate amount of light to perform photosynthesis. Photosynthesis is a vital energy-production process that supports the growth of healthy foliage and new blooms.
If your orchid appears limp-leggy or displays pale, yellowing leaves, it may not be receiving enough light. Contrary to popular belief, orchids are not low-light plants, although there are some low-light tolerant varieties available.

If your orchid is situated in a dim room with minimal natural light, such as an office or a north-facing room, it may be necessary to reposition it. Find a spot where it can receive enough sunlight to encourage new growth and maintain its overall vitality.
5. Nutritional Deficiencies
Yellowing orchid leaves can also be a sign of nutritional deficiencies. When orchids do not have access to the proper nutrients, they can exhibit various signs of deficiency.
Yellowing leaves, limpness, and an overall unhealthy appearance are common symptoms of nutrient deficiencies in orchids. It is crucial to address these issues promptly to ensure the long-term health and vitality of your plant.
The Role of Orchid Fertilizers: While fertilizers can be beneficial for orchids, it is essential to choose the right ones and apply them correctly. Some orchid fertilizers can actually harm your plant if they provide an excess or imbalanced ratio of specific nutrients.
For example, an excessive amount of calcium, manganese, zinc, copper, or phosphorus can hinder the uptake of iron by your orchid. This can lead to an iron deficiency, resulting in a condition known as chlorosis, where the leaves turn yellow.
Preventing Nutrient Deficiencies: To prevent nutrient deficiencies in your orchids, it is important to choose a high-quality orchid fertilizer that provides a balanced mix of essential nutrients.
Look for fertilizers specifically formulated for orchids, as they will have the appropriate nutrient ratios to support healthy growth. Additionally, follow the instructions on the fertilizer packaging for proper application to avoid over fertilization.
6. Pest Problems
When it comes to moth orchids, it's not uncommon to encounter a variety of pests that can cause problems for these delicate plants. Spider mites, scale insects, thrips, and mealybugs are some of the most common invaders that can wreak havoc on your orchids.
These pests tend to reproduce and spread rapidly, making it important to address the issue as soon as possible.
However, they can be quite tricky to spot, often requiring a closer inspection with a magnifying glass or by carefully examining the undersides of leaves. If you notice discolorations or webbing on the foliage, these may be signs of pest infestations.
Dealing with the Infestation: If you've discovered a pest problem on your moth orchids, there are several steps you can take to address the issue. One method is to wash away the bugs by using a strong blast of water.
This can help to dislodge and remove many of the pests from the plant. Another option is to physically wipe the leaves with a washcloth or paper towel that has been moistened with water. This can help to remove the pests and their eggs from the foliage.
For more serious infestations, it may be necessary to use a horticultural oil such as neem oil or anti-insect soap. These products can be sprayed onto the plants to help control the pests. It's best to do this in the morning when the orchids can dry off before the sun's intense rays reach them.
After 15 to 30 minutes, hose off the oil or soap from the plants to prevent any potential damage. Moreover, it's important to keep any infected plants separated from your healthy plants until the infestation has been completely remedied.
7. Climate Change
When it comes to orchids, any significant environmental change can cause transplant shock. This includes upgrading the size of the container, changing the soil, or root pruning.
These actions can induce stress in the orchid, leading to various issues. One common response to transplant shock is the shedding of leaves, as the plant tries to compensate for the changes by reducing its water uptake ability.
To rectify this situation, it is crucial to allow the orchid enough time to acclimate to its new soil. While fresh potting media may offer more nutrients, there might also be a slight change in pH that can affect the plant's ability to absorb these nutrients effectively. Patience is key during this acclimation period.
8. Potting Stress
Another factor that can contribute to orchid stress is the quality of the potting soil. Ideally, orchids should be planted in loose, fast-draining potting media that allows the roots to breathe.
Over time, the potting media may become crumbly or physically start to break apart. When this happens, it is necessary to change the soil to maintain the orchid's health.
If the orchid's soil remains compacted or hard, it is advisable to switch to a high-quality orchid mix or sphagnum moss with perlite. Additionally, if the soil becomes overly crumbly or emits an acidic or foul odor, it is a clear sign that it needs to be replaced.
9. Bacterial or Fungal Diseases
Yellowing leaves in orchids can be a symptom of a fungal infection, typically orchid leaves turning yellow at base. If the orchid bottom leaves turning yellow and there is a foul smell, it could be a sign of a bacterial or fungal infection.
In most cases, these infections are caused by overwatering and can lead to crown, root, or stem rot. If left untreated, the affected areas will turn black and can spread to both sides of the orchid leaves.
To address this issue, it is crucial to separate the infected orchid from other plants to prevent the disease from spreading. Using a pair of sterile scissors, carefully remove the affected areas. Additionally, spraying the plant with a fungicide can assist in combating fungal issues and preventing further damage.
10. Humidity Problems
It is a tropical plant that thrives in environments with a high level of humidity. However, most homes do not naturally provide the required level of moisture for these plants. The preferred humidity range for orchids is typically between 40% to 70%.
To increase humidity around your orchid, you can employ a few techniques. One option is to use a humidifier near the orchid to create a more suitable environment. Another method is to place the orchid on a humidity tray.
Create a tray by filling a shallow dish with stones or pebbles and then adding water. By setting the plant on top of the tray, it can absorb the moisture from the evaporating water, effectively increasing the humidity in its immediate surroundings.
Ultimately, understanding and addressing the various factors that can contribute to orchid stress is essential for maintaining the health and well-being of these beautiful plants.
Final thoughts
There are several reasons Why are my orchid leaves turning yellow. It could be due to overwatering, inadequate lighting, nutrient deficiencies, or pest infestation. It is important to carefully assess the conditions in which your orchid is growing and make the necessary adjustments.
Providing proper watering, adequate light, and a balanced fertilizer can help prevent yellowing leaves and promote healthy growth. Moreover, regularly inspecting your orchid for signs of pests and taking prompt action if necessary can help maintain its overall well-being.
FAQs
How Do I Fix Yellow Leaves on My Orchid?
To fix yellow leaves on your orchid, make sure you are providing the right amount of water and light. Orchids need indirect light and should be watered when the top inch of soil feels dry. Watering too much can cause root rot. Additionally, check for any signs of pests or diseases and treat accordingly.
Should You Remove Yellow Leaves from Orchids?
It is generally recommended to remove yellow leaves from orchids. Yellow leaves may indicate that the plant is stressed or experiencing a problem such as overwatering, nutrient deficiency, or disease. Removing the yellow leaves can help improve the overall health and appearance of the orchid.
What Do Overwatered Orchids Look Like?
Overwatered orchids may appear limp, with yellowing or drooping leaves. The roots may also become mushy or rotten, and there may be an unpleasant odor coming from the soil.
Additionally, overwatering can lead to the development of fungal or bacterial infections on the leaves or roots. It's important to maintain proper watering practices to keep orchids healthy.
How Often Should Orchids Be Watered?
A watering should be done approximately every 7-10 days for orchids. It is important to let the roots dry out between waterings to prevent root rot. Additionally, factors such as temperature, humidity, and the type of orchid should also be considered when determining the watering frequency.


Leave a comment